

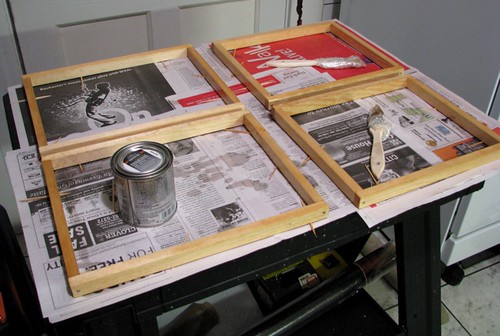
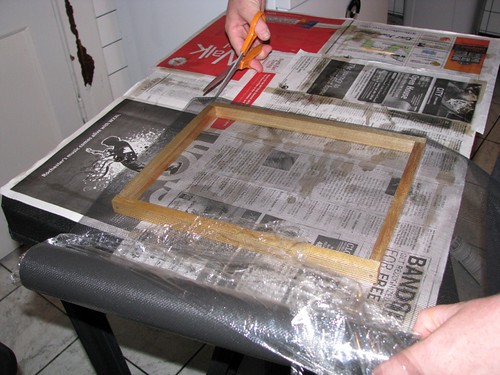
The wood trim was glued, clamped, and nailed together. After they were varnished, we attached fiberglass screen to one frame with a staple gun and trimmed off the excess screen. It’s a lot like stretching canvas over stretcher bars if you have ever done that.

(click pictures to visit my flickr page)
My hunny had been on a year long job search since attaining his MBA so we had a large quantity of résumé test prints coming out of our printer all year long. Hating to toss out paper that still had a clean back, I have been saving it to use for test printing my art, business items, and eventually to recycle it into “new” paper.
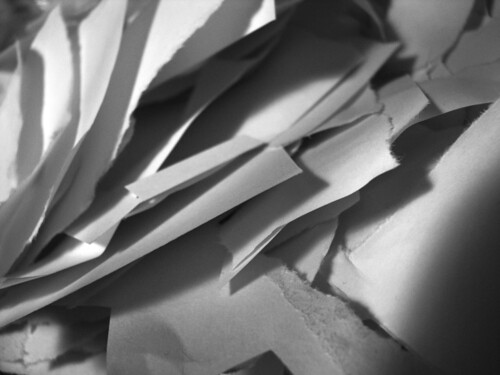
To make paper from this scrap I tore it into roughly 1” squares and soaked it in a bucket of lukewarm water for about an hour or until most of it would come apart if I agitated the bucket a bit. It needs to be to the “translucent” stage for the blender to do its work properly. A $3.00 garage sale blender I got this past summer for this purpose worked great!
I rang out a few handfuls of the soaked paper and put them in the blender that was half full of clean water and puréed until no letters from the paper were visible anymore (unless you want that because that can add a unique touch to your handmade paper). It looks kind of clumpy and feels soft and slimy.
At this point you can add various kinds of dyes if you wish. I added a half teaspoon of powdered purple RIT dye and a dash of salt to the second batch. Never before have I dyed paper so this was all guesswork at this point. Dying fabric calls for salt so I figured it shouldn’t hurt here. Blend in the dye until the color looks uniform. It is going to dry lighter than it looks right now so keep that in mind. Let it sit for about 20 minutes to let the dye do its job.
I set up my paper couching station and stocked it with a lot of newspaper, flour sack towels and cotton muslin cloths. Those blue reusable towels work well too. I bought 10 yards of white muslin at the craft store for $0.99 a yard and had a 40% off coupon. I hemmed them after I cut the cloth down to roughly a square yard each.
I purchased a 20”W x 26”D x 6”H vat that is large enough to accommodate the size of my deckle and mould at the home improvement store. Fill the tub to 3” deep with clean lukewarm water (my hands hurt if they are in cold water for too long). Scoop the pulp from the blender with your hands into the tub. Mix well. I chose to wear my bright yellow dishwashing gloves to keep the purple dye off my skin.
The thickness of paper is directly related to how much pulp is in the water. Too much and you’ll make cardboard. Too little and you’ll make tissue paper. It takes some experimenting to get it right. I had too little in the first non-dyed batch. You can see right through it. Might make some luminaries with it.
I set the deckle on top of the mould and at an angle dipped the bottom edge into the water and pulled towards myself as I pushed the mould flat down into the water. I let the pulp settle a bit and then pulled the mould straight up so its surface was level with the water surface. Pulling it out at an angle will make one side of your paper thicker. I let the water drain off, removed the deckle carefully so water did not drip onto the surface of the new paper, and turned to my couching station. I set one side of the mould on the towels and flipped the mould face down. Using a sponge I squished out the excess water. Then I delicately lifted the mould off from the top. Voila! Handmade paper!
I made 16 sheets in the first plain batch and I lost count in the purple batch. They sat to dry pressed between cloth, newspaper and heavy books overnight. The newspaper soaked up a lot of water. I got impatient for the paper to dry and used my iron to dry and flatten the sheets.
Right now I have one batch each of plain paper and various shades of purple paper pressing flat under a stack of big books on my dining room table. Since there is printer ink on it the plain paper is more grayish than white. The paper sheets are 8 ½” x 11”. Cut in half and folded they will make A2 sized greeting cards.
I might keep making more paper and sell some on Etsy. I also purchased some green liquid RIT dye. The next batch will be shades of green.


2 comments:
Hey, I was just wondering yesterday how handmade paper gets made. (Honest!) And now I know. Although I don't understand the part where you don't want to go around with dark purple hands...
how about lavender hands? that sounds calming.
Post a Comment
Without your comments, I'm just talking to myself! Say something before they come to take me away. Ha ha, ho ho, hee hee.