

We are so blessed to have Mr. M's father in our lives. Father's Day has been hard these past two years since I lost my dad. But Mr. M's dad is such a wonderful guy that I'm grateful for the opportunity to celebrate him!

Most of the time when I start working on something I really don't have the "Finished Piece" visualized in my head. There may be parts of it or just a color scheme to begin with. For this card I was reaching toward handsome and manly. Mr. M's dad is an outdoorsman and enjoys fishing. So I went with earthy tones and unusual textures.
I started with a blank piece of ivory cardstock, cut it in half, and folded it to make the card part. Using a foam blending tool I inked the edges of the card with some brown inks. Using two shades adds a lot of dimension and is worth taking the little bit of extra time to do so.
Next up was my choice of papers. Pretty much went all out brown on this one. Using that large of an area of bold vertical stripes was stepping out of my comfort zone. I like swirly backgrounds. But for a guy simple and stylish is the way to go. I distressed the edges heavily. Even tore some off to make it look really tattered. Then I inked the distressed edges to, once again, add more dimension.
At this point a plan does need to begin forming. I pulled out a couple scraps of paper and moved them around the face of the card until it looked pleasing, and I could decide where I was going. Eventually I chose a strip of map paper, a dark brown cardstock, paper that looks like burlap, and the sentiment printed from my computer that I designed in a font that looks like tire treads meets tweed meets stenciled lettering. How manly is that?!
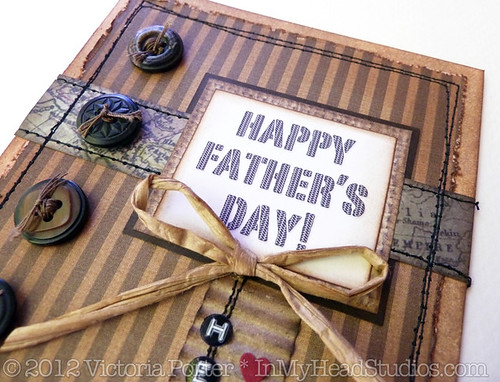
I wanted a layered look so I put the strip of map paper between the two mats for the sentiment. That helps tie the elements together.
When deciding to use my sewing machine on cards I find that if I don't really have a solid plan from here I mess the stitching up. Or sew the card itself shut. (Come on. Don't act like that never happened to you.)
First I adhered the map strip to the dark brown cardstock with the dark brown behind the map paper. Then I adhered that to the card. Time for the sewing machine!

I stitched all the way around the card twice and then ran border stitches along the map strip edges. On cards like this where distress is good neatness doesn't count. I wobble the line a bit. It's more interesting.
I glued the sentiment to the burlap paper and then glued that down over the map strip and stitching. See how planning ahead on the stitching prevented me from sewing through the sentiment? :)
(Can you tell I'm not a seamstress? 99% of the material put through my sewing machine is paper. I think the only fabric I stitched was my craft show tablecloth hem.)
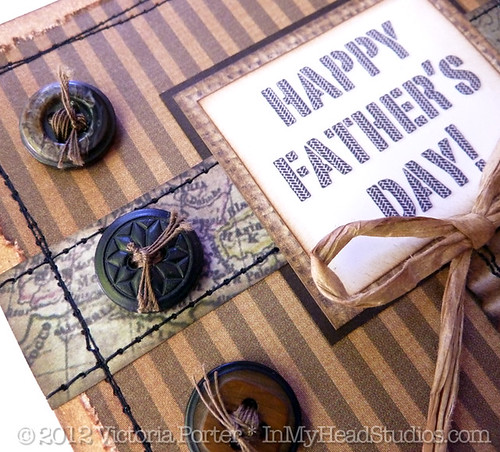
I love using buttons on cards, and for guys it's especially appropriate. I chose an assortment of brown buttons from my extensive stash. Whenever I use buttons I pretty much always add thread through the holes so it looks like it is stitched to the card. Buttons on my cards without thread look "unfinished" to me. Again since I was going for a distressed look neatness didn't count and I left some straggly threads hanging on.
I adhered the buttons to the card using Glossy Accents. I did so because it is wicked strong at holding 3D embellishments, and it dries quickly. Regular white craft glue would take hours to dry in that situation. This took 15 minutes. Joy!
I thought at this point I might be done, but there was this big blankness in the bottom right corner. It looked unbalanced. I had to come up with something to put there. Digging through the piles of paper options on my messy work table I came across a coffee shop cardboard cup sleeve that had been striped down to the corrugated inside part. Texture! And brown! Perfect!

I'm in love with bunting and banners of any sort right now. I thought this corrugate would make a cute flag. I trimmed it down to size and clipped the end to make points. The edges were inked in a dark brown and a little black. A tiny voice in my head wondered what this would do if I ran it through the sewing machine. Hmmmmm. Tiny Voice, you may have a good idea!
I tested it on a small bit of scrap corrugate. The heavy flattening power of the sewing machine foot
smushed the wavy texture down. But it was usable by bending it back into shape. Then I stitched the one for the card.
The card still didn't seem finished at this point yet. Hmmmmm. What to do? What to do?
DYMO! A solid go-to when stuck! I punched out the word "hero" and then used a regular 1/4" hole punch to pop out the letters so they would fit my flag. I glued them on lined up with the stitching.
I have a thing for using odd numbers of items in my design. "Hero" is four letters. Gah! It had to be balanced out so I added the three hearts. Ahhh. My OCD is calmed.

The spot where the flag met the seintiment mats looked stark. Another solid go-to for masculine cards is raffia. It's a good, natural material to get away with making a bow not look too foofoo. And, yes, I did ink the raffia a bit to make it look old. Once again, the Glossy Accents is the glue to use for sticking raffia bows to cards.
I'm wishing ALL the daddies out there a very Happy Father's Day!! I don't care how tough and gruff you are. If a two year-old hands you a toy phone, you answer it! :) xoxo
For the rest of you, have a shiny, sparkle filled Sunday!
I'm wishing ALL the daddies out there a very Happy Father's Day!! I don't care how tough and gruff you are. If a two year-old hands you a toy phone, you answer it! :) xoxo
For the rest of you, have a shiny, sparkle filled Sunday!
- Vickie


1 comment:
Oh, wow I love everything about this card! I especially love that you detailed your process like I do, and that you have stuff laying around like I do. I'm tellin' you, those neat people don't know what they're missing in the inspiration department! :D
Post a Comment
Without your comments, I'm just talking to myself! Say something before they come to take me away. Ha ha, ho ho, hee hee.