Tuesday, January 17, 2012

Doodles Unleashed Workshop: Week 2


Doodles Unleashed: Week 2: Full

I am so very excited to take another awesome workshop by Traci Bautista called "Doodles Unleashed".  Traci is the author of the new book Doodles Unleashed. You may know her from her book called Collage Unleashed. I already bought Doodles Unleashed online and am waiting impatiently for its arrival.

What is even cooler about this workshop is it's a FREE course offered by Strathmore Online Workshops

Strathmore is an art paper company. They make many of the papers with which I work. Traci is recommending for this workshop the 400 series of Strathmore papers made for specific uses such as mixed media (which is a thicker paper able to take the abuse of mixed media work). I like the acrylic paper in the 400 series, which has a nice faux canvas texture that also holds up well to mixed media use. 

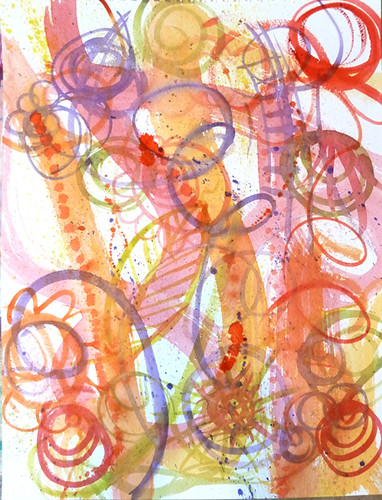
The image above is my Spontaneous Watercolor Background from Week 2 of the course. We were encouraged to play with the watercolor like mad scientists. This was my third attempt at getting it how I wanted. The first two were overworked and muddy. I will probably keep them and chop them up for other uses. [Image above: 11"x15", watercolor paper, © 2012 In My Head Studios]

I took a bunch of photos of this piece for future reference. I like to get in really close and get the details photographed. I love the macro setting on my camera. It's awesome. These images are good for making note cards and promotional materials. Also I print these photos for use in an art journal or other collage project. I like to make the most use of my work in this way.

Below you can see the close ups. Don't you love the splotchyness? That big splatter of orange hit that wide brush stroke perfectly. I was thrilled when that happened. Never underestimate the power of throwing paint at your work!

Doodles Unleashed: Week 2: Close


Doodles Unleashed: Week 2: Close

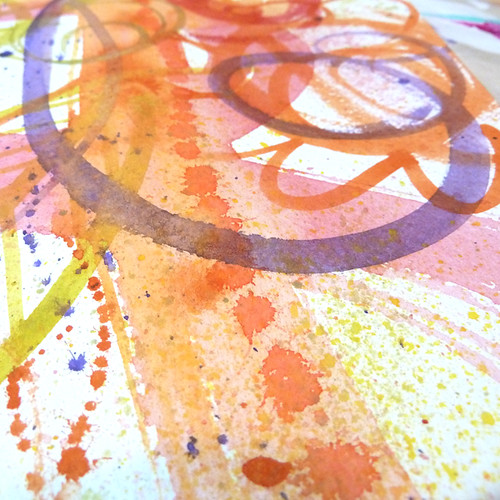
I'm practicing painting circles with a small round brush. For some reason this ability eludes me. I am happy with these circles because I remembered to keep my brush loaded with paint. (You can't paint without paint on your brush!!)


Doodles Unleashed: Week 2: Close

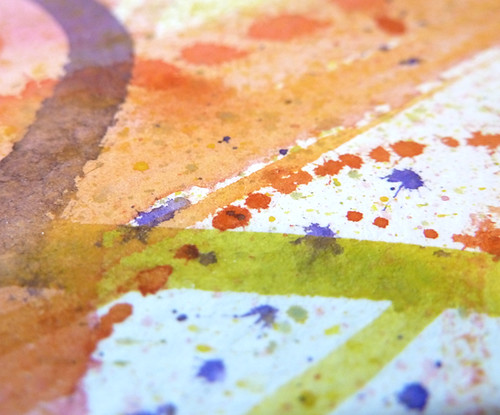
Love the splotchy splatters! Yes, I got paint all over myself.

Doodles Unleashed: Week 2: Close

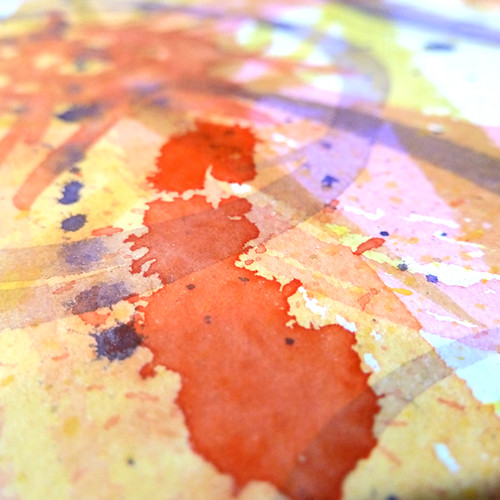
I waited for the first applications of watercolor to dry so I could go back over them with contrasting colors without making a muddy brown mix. When I say "waited" I mean I impatiently shot the heatgun at it until it dried.


Doodles Unleashed: Week 2: Close

I highly recommend signing up for this class if you like to doodle, experiment with paint, or want to increase your skills in these areas. Traci takes doodling to another level with paint. Doodling is a really important part of our creative development.

So get outta here! Go! Run right now to sign up for this class! I'll see you in the forums!


- Vickie 


p.s. I have not received any compensation, product or otherwise from Strathmore or Traci Bautista. I'm writing this to present cool stuff - not to make a profit off blogging. My opinions are my own. I am not affiliated with Strathmore or Traci Bautista.

Sunday, January 15, 2012

New! Bookmark My Blog on Your Mobile Device


In the sidebar of my blog you can now see the shiny new QR Code for my blog. When read with a QR Code Reader on a mobile device (iPhone, iPod, Android, etc) it opens a link to my blog. Add me to your bookmarks!

There are many apps to read QR codes for Apple products, Android, etc. On my iPod Touch I use RedLaser. This app works with the camera on your device. 

When you open RedLaser tap the little lightening bolt at the bottom. That opens the interface to align your camera to the QR code you want to open. You can see in the image below where it says to line up the edges with the arrows. Once the QR code is in place the arrows turn green and it tells you to hold still for the camera to read the QR code.


A little window opens showing you the URL that was read from the QR code. It offers you the choice to open the link or cancel.


Click "Open" and ta da! The link opens a tab in Safari and loads the page to which the QR code was directed. Usually it will open the mobile version of the site.

Now you can bookmark my blog quickly and easily on your mobile device! Yay!

I chose to use bit.ly to create my QR code. Above you can see the address I customized to make it clear that the link goes to this blog. When a QR code is generated through bit.ly, the service will track the number of clicks you get on that link. This is always juicy information for anyone who uses metrics to track website activity. 

The neat thing is that bit.ly creates a QR code for your link automatically. All you have to do is save it and plop it everywhere you want your readers to be able to open your links.

You can make a link to any website you want to - not just your own blog, Twitter, Facebook, Etsy, etc. I believe bit.ly is a better choice than to have just any QR code generator make your code.  

This isn't just for online uses either. You can print your QR code on business cards, fliers, and other promotional items so people can find you online from "real life". I've seen some really creative uses out in the field. I've even seen them posted up on billboards around town. (Please don't try to read that link while driving. Ask a passenger.) 

I'm going to print my code for my craft show booth so shoppers can learn more about me right away.

If you have questions please post them in the comments so we can learn from each other (or email me using the link at the top of my blog). I would love to see your uses of QR codes!


- Vickie 

Wednesday, January 11, 2012

How to Get an Awesome Facebook Timeline Cover Image


Recently my personal Facebook page was updated to the new "timeline". I kind of like it, but it requires a lot of scrolling down to see anything. 

At the top of the page is room for a giant "cover photo". I decided I didn't want a huge picture of little me in that spot. That's not very appealing to me. When I tried to put an artwork photo there it blew it up really big. I couldn't see all of it. So I thought, "What if I could make a photo mosaic of images that I *do* want on my page?" 

Look no further! I have the solution. And it's dead easy. 

Big Huge Labs creates a lot of fun things to do with your images. You can make jigsaw puzzles, trading cards, badges, calendars, and many other fun and funny choices. 

One of the most handy to me is the Mosaic Maker. There are many ways to customize photos, sizes (columns and rows), and where it can pull your images from. 

This is the main page of Mosaic Maker. These are the default settings. 

  
To make my mosaic for Facebook I needed to decide where to get my photos from. If I choose to pull my photos from Facebook I need to login. 

 
I want to fill my mosaic with my flickr set. I created a new set on flickr specifically for the photos I wanted to fill my mosaic. I could have also uploaded them individually from my computer, from a Facebook album, flickr photosets, flickr faves, flickr tags, or an individual flickr user. Here is my flickr photoset


These are my mosaic settings.


To fit in the Facebook cover image spot I chose a layout of "square tiles" with 8 columns and 3 rows. It shows a little preview of the shape the mosaic will be. You get 32 images for this size. (The maximum the Mosaic Maker allows is 36 images, but that's going to be too big for the Facebook cover spot.) 

I also have the option to choose the background color and the border color. I chose black for both. I chose 5 pixels as the space between images (the default). 

When "flickr photoset" is chosen the Mosaic Maker brings up the next box to enter the URL for the photoset. To find the photoset URL I opened the set on flickr and highlighted and copied the URL in the address bar. Then I pasted it in the box back at the Mosaic Maker page. It also lets me choose the page number of the set I want it to use if my set is more than one page. 

I clicked "Create". The next page opens my beautiful new mosaic. I can go back and edit it as much as I want if it didn't turn out like I planned. 


Then I clicked "Save" to download the image to my computer (pay attention to where it saved so you can find it). 

There are options to share it directly to flickr, Facebook, or an email address. Under the mosaic I made it has the HTML for the mosaic so it can be embedded in something like a blog post. I like that if you choose to use the HTML it makes links back to the photos so the creators get credit. (Play nice if you post a mosaic made with other peoples' photos and give the credits.) 

All the hard work is done. Now all I had to do was click "Change Cover" back on my Facebook timeline and upload my mosaic. Alternately, you could post the mosaic in your Facebook photo albums and choose from there. 

Ta! Da! 

[I'm no expert on pixel dimensions on web sites, but I think the image is roughly 850 pixels x 315 pixels. Someone please correct me if I am wrong.] 

Now you have the most awesome cover image! Wait - yours would be the second most awesome because mine rocks. :) 

- Vickie

ShareThis